Build a personal website with Hugo
Why Now?
Covid-19 has spread around the world, sending billions of people into lockdown and this is a good time to build something new. If you are looking to build a website/blog for your own, you can follow this series and have your site ready in a couple of hours.
This is the first post of 3 part series, I hope it will be helpful. 🙂
What is Hugo?
Hugo is one of the most popular open-source static site generators. It is written in Go language (don’t worry you don’t need to know a single line of Go for this tutorial) and quite fast. It helps you to create your content with your text editor and can be deployed to almost any platform.
If you would like to learn more, don’t forget to check this page.
1. Prerequisites
- Git
- Hugo (also Go)
- Code Editor: You can use any text editor but I prefer Visual Studio Code
- Github account (starting with Part 2)
- Netlify account (starting with Part 2)
- Domain (only in Part 3)
2. Installations
The following steps will be based on macOS but I will link similar tools/steps for Windows as well.
2.1 Package Manager
Normally we don’t have to use a package manager but I strongly recommend using one. It will make things easy for us in the future. For macOS my favorite is Homebrew. If you are a Windows user you can use Chocolatey.
To install Homebrew on your Mac, you just need to open the Terminal, then copy and paste the code below. You can open the Terminal by pressing Command + Space and typing Terminal or find it in the ‘Utilities’ folder in Applications.
/bin/bash -c "$(curl -fsSL https://raw.githubusercontent.com/Homebrew/install/master/install.sh)"
You can follow this tutorial to install Chocolatey to your Windows machine
2.2 Git
Since we have installed our package manager, now we can proceed with the installation of the necessary packages. With Homebrew, it is quite straight forward. Run the command below to install git to your machine:
brew install git
or for Windows:
choco install git
Once it has been completed, you can install Hugo. It will also install Go as a dependency.
2.3 Hugo
On macOS, use the following command:
brew install hugo
For Windows, you can use the command below but you can follow this official guide as well or run:
choco install hugo -confirm
For both systems you can use command below to verify your installation. It should have an output with the Hugo version:
hugo version
2.3 Code Editor (Optional)
If you would like to install the Visual Studio Code, you can just run the following command.
brew cask install visual-studio-code
3. Create a new site
If you have completed all the steps above, now you are ready to create your site. First, go to the directory that you would like to create your site in. You can use cd command for that.
If you are not sure about the exact location of the directory, just write cd (with space at the end) to Terminal, then drag and drop the folder that you would like to use and press Enter. You should have something like this:
cd /Users/berkay/Dev/Projects/
You can use the command below to create your new site. It will create a folder called mypersonalsite in Projects folder and create your web site there. Feel free to change mypersonalsite with anything you want.
hugo new site mypersonalsite
4. Add a theme to your site
Now, you need to find a theme for your site and add it to your project. You can check this page and select one from the gallery. In this tutorial, we will use the Yinyang theme.
Go to your favorite theme page and click the Download button. When you are redirected to the Github page of your theme, click Clone or Download button and copy that URL.
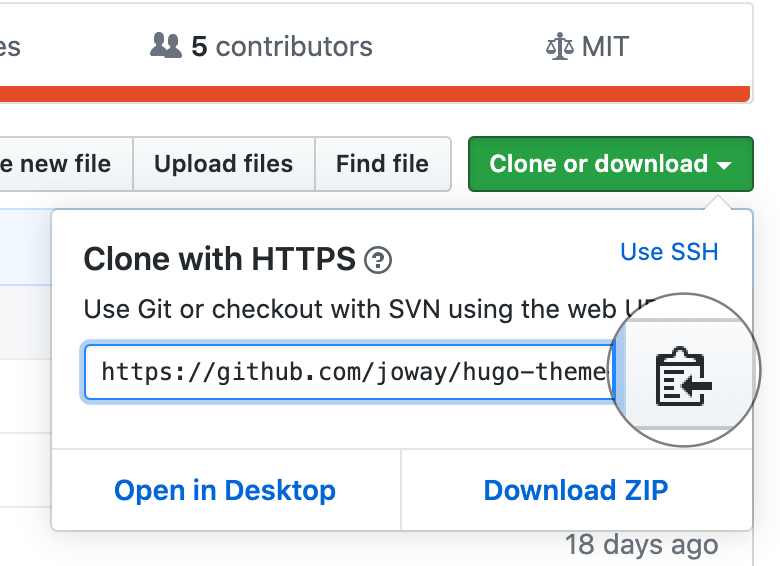
Now, you can use the commands below to add a theme to your project.
cd mypersonalsite
git init
git submodule add https://github.com/joway/hugo-theme-yinyang.git themes/yinyang
Change your project’s theme with this command:
echo 'theme = "yinyang"' >> config.toml
5. Add some content
You can manually create content by creating content files in the content folder but you can also use the command below to create your first blog post.
hugo new posts/my-first-blog-post.md
Edit the created file with your favorite text editor. It is a markdown file, if you are not familiar with markdown you can check this guide. It will only take 60 seconds.
My example looks like this:
---
title: "My First Blog Post"
date: 2020-04-06T12:30:26+02:00
draft: true
---

## Hi, I'm Berkay!

This is my website created with [Hugo](https://gohugo.io/)
6. Start the Hugo server
Congrats! You’ve created a Hugo site, changed its theme and added your first blog post. Now, we can check how does it look like with command below:
hugo server -D
This command will start the Hugo server with drafts enabled. The reason is we didn’t change the draft tag in our blog post and it would not be visible otherwise.
Check the address in the line below and go to that address(http://localhost:1313) using your favorite browser:
Web Server is available at http://localhost:1313/ (bind address 127.0.0.1)
Press Ctrl+C to stop
You should see something like this if you have used the same theme:

Part 2 of this series, will be published soon. If you have any question feel free to use the box below.